
If you’ve read the previous reports on the brown gambeson and the Gorillambeson, you’d already be aware that this is the present culmination of that line of development. It’s still not perfect and I already have a few tweaks I’d like to make to future iterations, but from this point on it’s mostly going to be more a process of refinement rather than radical rethinks and redesigns. Meanwhile, the personal jacket project represents a largely separate and parallel line of development with rather limited applicability to this case.
The basic idea for this project was to use the lessons I had learned from the Gorillambeson to build an extra-simple HEMA jacket from the ground up and see whether I can do it efficiently enough to justify at least some kind of regular small-scale production. That idea led to the design below.

In terms of padding, most of the jacket was intended to have one layer of recycled felt filling (of the same kind used on the Gorillambeson, and quite similar to the material used inside SPES jackets) except for the blue areas — i.e. the non-overlapped parts of the front pieces, which would have two layers of batting sandwiched between the shell and lining. The overlapped part would only have one layer on each side, but the overlap would functionally give the jacket two layers of padding over the entire front of the body pieces.
The actual work of cutting and sewing the jacket was largely devoid of drama since I was relying heavily on processes I had already worked out through trial and error on the Gorillambeson. The first thing to do was of course to quilt/padstitch the components (shell, lining, and padding) of each individual body piece separately, then assemble the padded-up body pieces together.
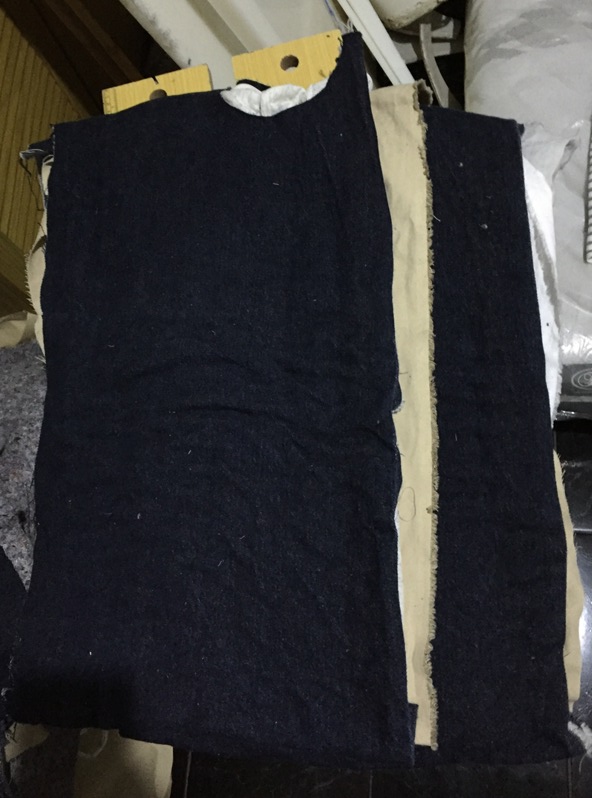
Then I quilted the sleeves and attached the shell to the body pieces. Here I didn’t cut the felt batting to match the shape of the sleeves, but rather as straight untapered strips just wide enough to match the sleeves’ circumference at the cuffs. The original intention was to leave the bottom/inner half of each sleeve unpadded so that the padding wouldn’t interfere too much with the wearer’s movement in the elbow and the armpits. The square underarm gussets were also left unpadded; I added a couple of layers of fabric to compensate for the lack of padding there.

Note that I had already closed the side seams between the body pieces and also the underarm gussets. I think I closed the seam along the bottom of one of the sleeves too, which would become relevant later. For now let’s have a look at the whole thing from the inside, where I hadn’t closed any of the lining seams:

Just visible at the edge of the collar is part of the old T-shirt I sandwiched between the two layers of padding on each of the front pieces — something I had made into a standard practice since the days of the old brown gambeson.
But back to the sleeves. At this point I thought I’d try completely closing one sleeve by sewing up the bottom seam on the shell piece first, working from the inside (jacket inside out, right sides together). Then I’d close up the lining seam from the outside, still working with the jacket inside out. Once everything had been closed up, I would then pull the sleeve through the wrist opening into its final right-side-out condition. As it turned out, this would have made sense for an unpadded garment, but the batting made the sleeve hard and rigid enough that I ended up having to spend a great deal more effort than I expected to yank it right side out. Of course I learned the lesson, and for the other sleeve I adopted the much more sensible idea of flipping the sleeve right-side-out before I closed the long bottom seam; I then sewed up the seam on the lining first before closing the shell seam from the outside. This alternative method proved to be much simpler and more practical and it’s probably what I’m going to use for future garments (if I get to make any).

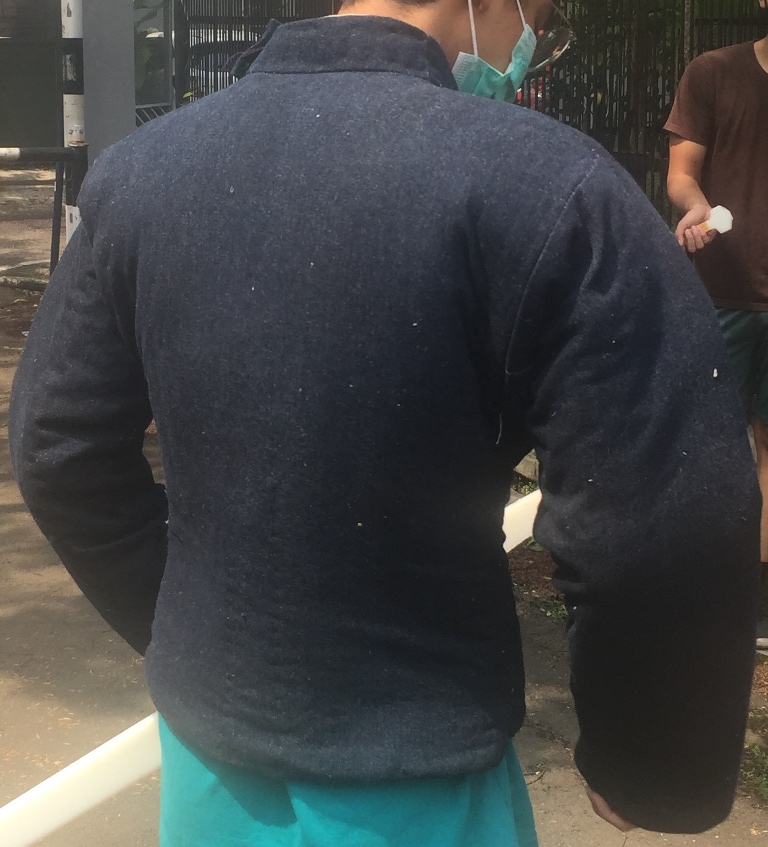
The next order of business was to neaten up the front and install the zipper. Unfortunately I didn’t take any detailed pictures of this phase — again, because it was a pretty straightforward affair and there’s hardly anything that hasn’t already been discussed in the Gorillambeson report. And once both sides of the zipper had been installed, it was time for my favourite part: the Frankenstein test, basically just a matter of seeing whether the fully assembled jacket had enough structure to stand up on its own without any kind of stand, form, or mannequin propping it up from the inside.

What else can I say? IT’S ALIIIIIVE

The Delta surge was at its height when the jacket was finished, so it took a few more months before I finally had the chance to test it out in a group practice session with my club. It was still a very small and informal session and we didn’t stress-test the jacket all that hard. I think this was also around the same time that I started calling the jacket Nellie, from NLE (“No Longer Experimental”).

There were two major notes we identified from this test. The first was that the sleeves were somewhat too long for wearers who didn’t have absurdly long arms. The remedy was pretty straightforward and I’ve shortened the sleeves by a couple of inches since then. It’s also possible that I might talk to people who might want to commission future jackets to suggest using a lighter and less stiff batting material (maybe something similar to the Dacron/polyester batting on the brown gambeson) for the sleeves.
So what’s next? I’m not sure either. I might sell the jacket on like some of the previous experiments, or I might hold on to it as a loaner piece for the club and a physical sample to display in future events (if I ever get to attend any, that is). And I’m not going to stress myself out over it since there’s no need to decide in a hurry. What’s important is that Nellie’s basic design seems to be a major step closer to answering the issue of how to produce more affordable torso and arm protection for the Indonesian HEMA scene (as I griped about back in 2017). Still not a perfect solution, and I’m not quite sure I can turn much of a profit if I want to keep the prices affordable, but at the very least I wouldn’t be stuck in the same dilemma as with the more complex and refined design for my personal jacket (i.e. I’d either have to charge a high price no better than those of imported products or take a severe financial loss due to the amount of labour that would have to go into another iteration of the jacket).

[…] This is the third in the series of catch-up reports on the jacket and gambeson projects I’ve been working on since 2017. Other installments can be found here (for the original brown gambeson), here (for the Gorillambeson), and here (for the Nellie/NLE (“No Longer Experimental”) jacket). […]
LikeLike
[…] But on the whole I wasn’t dissatisfied with the Gorillambeson since it has provided me with some valuable lessons to apply in subsequent projects, especially the Nellie (NLE/No Longer Experimental) jacket I made in late 2020-early 2021. […]
LikeLike
[…] on their own dedicated posts: for the Gorillambeson, for my personally-fitted HEMA jacket, and for the Nellie (NLE/”No Longer Experimental”) jacket, […]
LikeLike
[…] Bess? Well, the previous model was Nellie, and it happened to be the third model in the series (after the 2017 experimental gambeson and the […]
LikeLike